This is what the inside looked like, I just used the same paper as the clouds to write a message on.
Monday, December 9, 2013
Birthday Card
This is a birthday card that I put together for one of my friends. You can use any saying, but I thought it was cute:
This is what the inside looked like, I just used the same paper as the clouds to write a message on.
Wednesday, December 4, 2013
Speaker Box
Here we go December! Just wanted to start sharing some of the projects I've been working on lately.
We recently got our living room wired up with speakers which was quite the adventure. Kevin wanted one of the speakers to sit on our table underneath the TV and I told him that was okay but I didn't want an ugly speaker to just be sitting there... so I decided to make a speaker box!
Here's the finished product:
The finished product makes me happy because it's aesthetically pleasing and Kevin likes it because it doesn't hinder the sound!
Here's what it looked like before:
-I used oak wood that I had left over from a previous project and then I bought a sheet of metal from Lowes with the design already on it.
-I spray painted the metal with Rustoleum and stained the wood. Here's a couple more images:
These are the pieces of wood I used
I tested out different stain colors to figure out what matched in my living room the best
This is the framing for the front of the box before I stained it
This is the metal sheet I used, a close up view of what it looked like before spray painting
In these two you can see the clamps I used when I glued and nailed everything together as well as the corners I took out so that the metal would rest into the front of the box.
We recently got our living room wired up with speakers which was quite the adventure. Kevin wanted one of the speakers to sit on our table underneath the TV and I told him that was okay but I didn't want an ugly speaker to just be sitting there... so I decided to make a speaker box!
Here's the finished product:
The finished product makes me happy because it's aesthetically pleasing and Kevin likes it because it doesn't hinder the sound!
Here's what it looked like before:
-I used oak wood that I had left over from a previous project and then I bought a sheet of metal from Lowes with the design already on it.
-I spray painted the metal with Rustoleum and stained the wood. Here's a couple more images:
These are the pieces of wood I used
I tested out different stain colors to figure out what matched in my living room the best
This is the framing for the front of the box before I stained it
This is the metal sheet I used, a close up view of what it looked like before spray painting
In these two you can see the clamps I used when I glued and nailed everything together as well as the corners I took out so that the metal would rest into the front of the box.
And here's the finished box before I added the metal mesh. I left the back open because you don't see it and obviously you had to fit the huge speaker into it!
Saturday, July 20, 2013
20 Crafts in 20 Days! Crafts 8 and 9, "Take Flight" and a tiny hemp wrapper jar
I have had the shadow box and materials to make my "Take Flight" frame for soooo long. I'm so glad that I have been forcing myself to craft everyday or I might never have got this done. And it was SO EASY. It took almost no time at all to get it put together with only one minor set back. This was the final product:
Kevin and I love to travel and I have been trying to find some different fun ways to document all our trips. This idea came from a similar shadow box idea where the person was collecting ticket stubs to concerts. Since we don't goto all that many concernts I thought it would be a cuter idea to add a single ticket stub from every flight we take into the shadow box. I'm really happy with how it turned out. One of the downfalls that I wasn't anticipating was the tape that was used to hold on the advertising for the product. It was clearly not very well thought out, I had to unscrew the glass from the outside in order to remove the cardboard and then I had to use an adhesive sticker remover to get the excess tape off. Luckily in the end it worked out, but I was fairly disappointed in the company that did the packaging for the product. In this picture you can see the tape smudges left over after I removed the glass:
This is the first hemp wrapped glass container that I've tired. It took about as long as I thought it would take to do, which is FOREVER. I recommend putting on a good TV show or movie before you start this project and just work on it while you are watching. It also took a few glue sticks from my glue gun, but I think in the end I like the way is looks, I have to figure out what else I want to add to the jar now.
20 Crafts in 20 Days! Crafts 6 and 7- Card Organizer and Baby Shower card
This evening there was a baby shower for one of our friends so I made a card for the occasion and then while I was at it I figured why not make a card organizer similar to one I found on Pinterest that I desperately needed anyway!
This is the card I made for the shower, I added a little heart to the inside to pull it all together:
Then here are the pictures of the card organizer that I made, the first picture is of the different dividers that I made and then the second picture is how I have them set up in a couple of baskets:
Organizing my cards like this really motivates me to make more cards, which I have currently been a little obsessed with anyway. One thing I do when I am making cards is that I make two of every card I make. Usually you have enough paper to make two of the same card and then if you ever need a card on the fly it's possible that you will already have one made!
20 Crafts in 20 Days! Crafts 4 and 5, Chirstmas twig tree and Noel button tree!
Yay Chirstmas!! So sorry it has taken so long to update this last week, all I can say is that sometimes life just gets in the way. Friday the 12th we had a girls craft night at my place and I made this twig Chirstmas tree, from a post I found on ... Pinterest of course!
I think it turned out about as good as it could have haha. But I'm sure I'll use it somewhere.
The second Chirstmas craft that I accomplished was this button tree on canvas, the idea also came from something I saw on Pinterest but I changed some things around to make more something that I would use:
I'm thinking about using this for above my cabinets somewhere this year. I used a glazing technique on the canvas which added the extra texture. First time I have done anything like that and I think I like how it turned out.
The second Chirstmas craft that I accomplished was this button tree on canvas, the idea also came from something I saw on Pinterest but I changed some things around to make more something that I would use:
I'm thinking about using this for above my cabinets somewhere this year. I used a glazing technique on the canvas which added the extra texture. First time I have done anything like that and I think I like how it turned out.
Friday, July 12, 2013
20 Days 20 Crafts, Crafts 2 and 3 - Tree branch sunburst mirror and labels for garage storage
So I have actually crafted every day so far but I haven't updated yet!
So two days ago I finished my tree branch sunburst mirror which I have had the stuff for since last year sometime...
All we have to do now is hang it up!
Then yesterday I finished my labels that I am making for my work shop. (A lot of my crafts are going to surround my workshop because I'm trying to complete it).
I used a Martha Stewart Punch Around The Page, punch set to do the teal labels and then I used some brown paper behind to place them on. I'm going to use clothes pins that I painted teal to hang them up on the different baskets in my workshop. (Pictures to come in the future!)
So two days ago I finished my tree branch sunburst mirror which I have had the stuff for since last year sometime...
These are the materials I used, I cut a circle out of plywood with my jigsaw (about an inch smaller than the mirror I used. I bought the mirror at Michaels with a 40% off coupon and the branches I just picked up during a walk I took with one of my girlfriends. Here's the finished product:
All we have to do now is hang it up!
Then yesterday I finished my labels that I am making for my work shop. (A lot of my crafts are going to surround my workshop because I'm trying to complete it).
I used a Martha Stewart Punch Around The Page, punch set to do the teal labels and then I used some brown paper behind to place them on. I'm going to use clothes pins that I painted teal to hang them up on the different baskets in my workshop. (Pictures to come in the future!)
Tuesday, July 9, 2013
20 Days 20 Crafts, Craft 1 - Painted Cork Board
I am trying to help motivate myself to stay creative every day and to help myself finish all the different projects I have flying about our house. So I've decided to do 20 crafts in 20 days. Today's craft was stenciling the old cork board that I will be using in my (almost completely finished) work shop. Here are the materials I gathered for the adventure:
I had already painted the edge of the cork board in the accent color that I have been using for the work shop, so I grabbed the remaining paint from that (Valspar Nautical, from Lowes). Then I acquired a Martha Stewart stencil set (Arabesque) and some sponge brushes.
This was the final product:
SO craft 1 of 20 complete! Not sure what I'm going to work on tomorrow yet, but I'm sure I'll think of something!
Dad's planter bench
So since I am struggling to finish writing entries about the house because it seems every room is missing something essential I thought I would post some of the other things I've been getting into in the mean time.
Last year for Father's Day I promised my Daddy a planter bench. One thing lead to another ... anyway he finally received it this year!
Here are some of the prep photos of actually putting it together. I combined three different plans that I found on-line to create a custom bench fit for his porch.
At this point all I needed to do was the trim work, and at this point I ran out of wood... for the second time!
Then finally...
The finished product! The biggest downfall of the bench was that it weighed a TON. I could barely lift one side. Now Mom and I get to stain it and then it's on to the next wood project!
Last year for Father's Day I promised my Daddy a planter bench. One thing lead to another ... anyway he finally received it this year!
Here are some of the prep photos of actually putting it together. I combined three different plans that I found on-line to create a custom bench fit for his porch.
This one is just the basic assembly then in the next one I started adding the facing (the bench is on it's side)
I used just basic 2x4x8 boards from the top choice section in Lowe's. They are usually soaking wet when they get them in so we are going to wait a couple weeks before staining the finished bench.At this point all I needed to do was the trim work, and at this point I ran out of wood... for the second time!
Then finally...
Wednesday, November 7, 2012
Add a little Swagger.
So one of the side projects that I created were my "To-do" jars.
In the "swag list" jar I have a bunch of pieces of paper with little tasks on them that Kev and I have no desire to do. I pick one out every week or two weeks and it's a task that we HAVE to complete in that time frame. It forces us to complete tasks that we would otherwise not be interested in.
In the "craft" jar I have a bunch of crafts that I want to complete for the house. With the overwhelming number of things that you can find to do on Pinterest it's incredibly useful. I'll post a few of the crafts I've completed so far in a few posts, I have a lot of Christmas crafts so I hope you guys are excited for some holiday decorating!
In the "swag list" jar I have a bunch of pieces of paper with little tasks on them that Kev and I have no desire to do. I pick one out every week or two weeks and it's a task that we HAVE to complete in that time frame. It forces us to complete tasks that we would otherwise not be interested in.
In the "craft" jar I have a bunch of crafts that I want to complete for the house. With the overwhelming number of things that you can find to do on Pinterest it's incredibly useful. I'll post a few of the crafts I've completed so far in a few posts, I have a lot of Christmas crafts so I hope you guys are excited for some holiday decorating!
Thursday, October 25, 2012
Command Center Desk Creation!
So I wanted to show a before and after picture of the desks from the command center.
This is what they looked like before:
I removed all of the old molding and refinished the fronts of it with new molding. I sanded, painted, and then added a couple coats of polyurethane. This is my first furniture project and I thought the results were fair.
Desks afterwards:
This is what they looked like before:
I removed all of the old molding and refinished the fronts of it with new molding. I sanded, painted, and then added a couple coats of polyurethane. This is my first furniture project and I thought the results were fair.
Desks afterwards:
Dining room transforms into Command Center
This is the closest thing to a "before" picture that I have of this room. Obviously, at this point we had painted, changed the light fixture, and removed the hideous carpet. Just picture some ten year old carpet covered in cat pee and an old 80's style wrap around desk floating in the middle.
This room connects to the kitchen (to the left) I am standing in the living room, and to the right their is a stairway down to the basement. You can actually see off to the right where the floor was saturated with cat pee and had started to warp.
So step one for this room (after painting) was replacing the carpet with a strand of bamboo that Kevin and I had picked out. We had already tiled the kitchen at this point so we knew that we had to make the bamboo even with the tile floor. We ended up needing to put down an extra layer of OSB board in order to make the floor even throughout the whole house. So the first thing that needed to be done in this room was to replace the sub-floor that had the "water" damage.
This was the removal, we just completely took out one 4x8 piece. We used an assortment of tools including a circular saw and a pry bar (It was a pain in the butt to do this). If you do need to replace sub-floor it is important to make sure the board you buy to replace the original is the same width. The next step was to put the replacement board down, which we did...
and...
So there we go, room 1! Almost/pretty much/mostly complete :)
Here are a few additional pictures:


This room connects to the kitchen (to the left) I am standing in the living room, and to the right their is a stairway down to the basement. You can actually see off to the right where the floor was saturated with cat pee and had started to warp.
So step one for this room (after painting) was replacing the carpet with a strand of bamboo that Kevin and I had picked out. We had already tiled the kitchen at this point so we knew that we had to make the bamboo even with the tile floor. We ended up needing to put down an extra layer of OSB board in order to make the floor even throughout the whole house. So the first thing that needed to be done in this room was to replace the sub-floor that had the "water" damage.
This was the removal, we just completely took out one 4x8 piece. We used an assortment of tools including a circular saw and a pry bar (It was a pain in the butt to do this). If you do need to replace sub-floor it is important to make sure the board you buy to replace the original is the same width. The next step was to put the replacement board down, which we did...
until we heard some meowing from underneath the board. We had to take the board back up and rescue one of our cats that thought it was the coolest place to hide. Then the board went back down and I took a picture of Kevin vacuuming because it doesn't happen very often.
After this step we had to put an additional layer of OSB board down throughout the whole room, I don't have a picture of that in this room. Once that layer was down the underlayment went down. We put a moisture barrier down first and taped it together then the foam went down that provides less squeaking of the bamboo plus some added softness when walking (or if cats are running across it).
Books is helping us out once again with the flooring in this room, testing out the underlayment
We started the bamboo in our living room which connects to the "Command Center." We ran the bamboo perpendicular to the support beams, which will reinforce it. Connecting the two rooms was a bit tricky, it was important to stay square...even if your walls are not square! It's also important to have a gap between the wall and the wood to allow for expansion... the manufacturer of your flooring will give an estimated distance they want you to use to allow for the expansion... one of the things to remember though is that you will need to put quarter-round around the edges to cover the distance. (We didn't remove our base molding). We bought a floor nailer from Harbor Freight and used it for the whole install, to use the model we bought you have to have a compressor, which we also purchased from H.F., we haven't had a complaint yet, I use the compressor at least once a week working on woodworking projects out in the garage. My advice is READ ALL THE DIRECTIONS! It's important to do what the manual says or it will stop working correctly.
We were happy to note that the transition from kitchen tile to bamboo was nearly perfect.
In this picture you can barely see the door frames, we used a friends advice and borrowed a biscuit cutter to get underneath the door frames so we could slide the bamboo seamlessly underneath and there would still be room for the wood to expand. I used a clear silicon to seal from the door frame to the bamboo afterwards.
This picture is when we were almost finished with the "Command Center":
It's a little dark, but you can see the boxes of bamboo, plus the nailer, plus the hose to the compressor. Kevin and I worked as a very good team, I would make all the cuts and he would line up the nailer. It went fairly quick, but slower then we anticipated (as most projects do!)
I finally had a girlfriend come over and take some finish pictures last week!
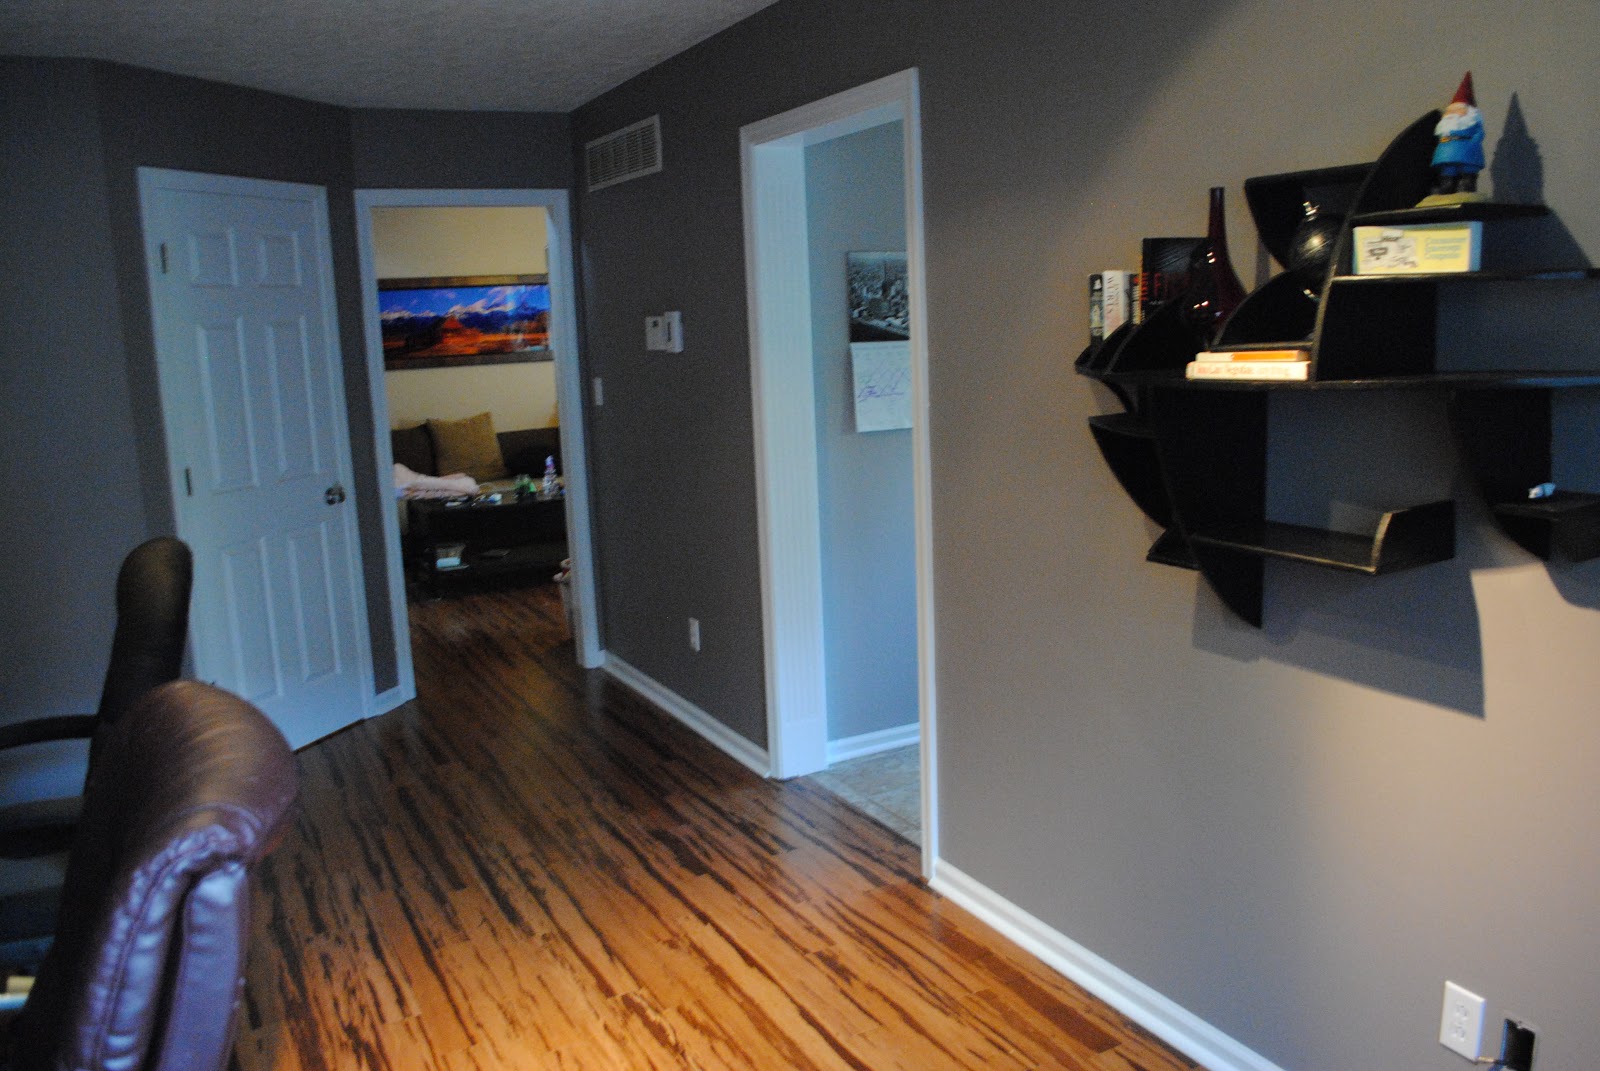
Here is the nearly (I'll always work on decor!) finished product:
I finally had a girlfriend come over and take some finish pictures last week!
Here is the nearly (I'll always work on decor!) finished product:
So there we go, room 1! Almost/pretty much/mostly complete :)
Here are a few additional pictures:
Subscribe to:
Posts (Atom)